
Furnace Not Working – The Most Common Fix
Furnace Not Working – The Most Common Fix
On average, every six furnace calls we got, one of them is guaranteed to be this problem – furnace not working.
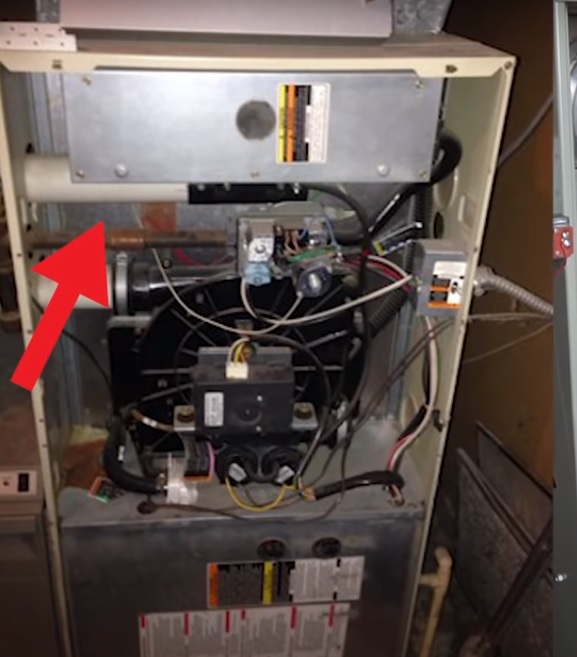
To begin with, take off the top door on your furnace. Sometimes it’ll be held in by some screws, other times the doors will just pop off. Also, on some Trane furnaces, you have to take the bottom door off before you can take the top off.
Get the top door off. A lot of times, there will be a handle on the top door, you have to press up and pull out.


And then with your thermostat calling for heating, just look and see what your furnace is doing.
If you don’t know yet how it works, we want to go over briefly how your furnace works.
The very first thing that starts will be your inducer motor. After the inducer motor turns on, the pressure switches closed then the igniter starts to glow.


You should see that start to blow in a little bit. The igniter is the one with two wires going to it. You will see the igniter glowing that bright orange glow then the gas valve opens and the flames turn on.
Notice how they only stay on for a couple of seconds and then they turn right off. If you’re seeing your furnace burners doing that, when they only just come on for a couple of seconds and go off it’s almost guaranteed that your problem is a dirty flame sensor.

The Control Board will send a hundred twenty volts to the igniter and you will see it glowing. Then the gas valve will open up the flames and if your flame sensor is clean, it should be sensing the flame.
The control board sends the flame sensor anywhere from fifty volts to a hundred twenty volts. Usually, it’s about ninety on most furnaces. It sends voltage to the flame sensor and that voltage jumps from the flame sensor onto the flame and to the burner phase to make a connection to the ground.
And the control board senses that voltage drop and it keeps the furnace on.
Now, if the flame sensor is dirty, it prevents that voltage from making that jump on to the flame and onto the burner so it turns off the gas valve and shuts everything out.
The flame sensors on this side right and generally you’ll have one wire going to it. It will be on the opposite side of the igniter, held in by one screw.
Take note that almost all of the newer furnaces have a lockout feature. If the furnace tries to ignite five times in a row and it goes off because of that flame sensor, it’ll go into a lockout for three hours.
Your furnace will just sit there and do absolutely nothing. Then in three hours it’ll come back on and try again the process.
To reset that lockout, all you got to do is turn that furnace power switch off for a few seconds and then turn it back on and that will reset it.
Cleaning the flame sensor is very easy. To begin with, turn off your furnace power switch before you touch anything inside for your safety.
To clean the flame sensor, you need to take it out. It’s usually held in there either by a quarter-inch nut screw or a Phillips screw.
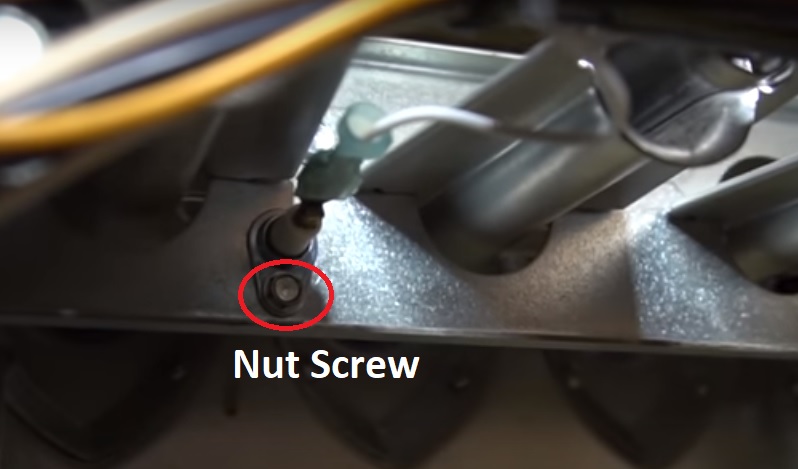
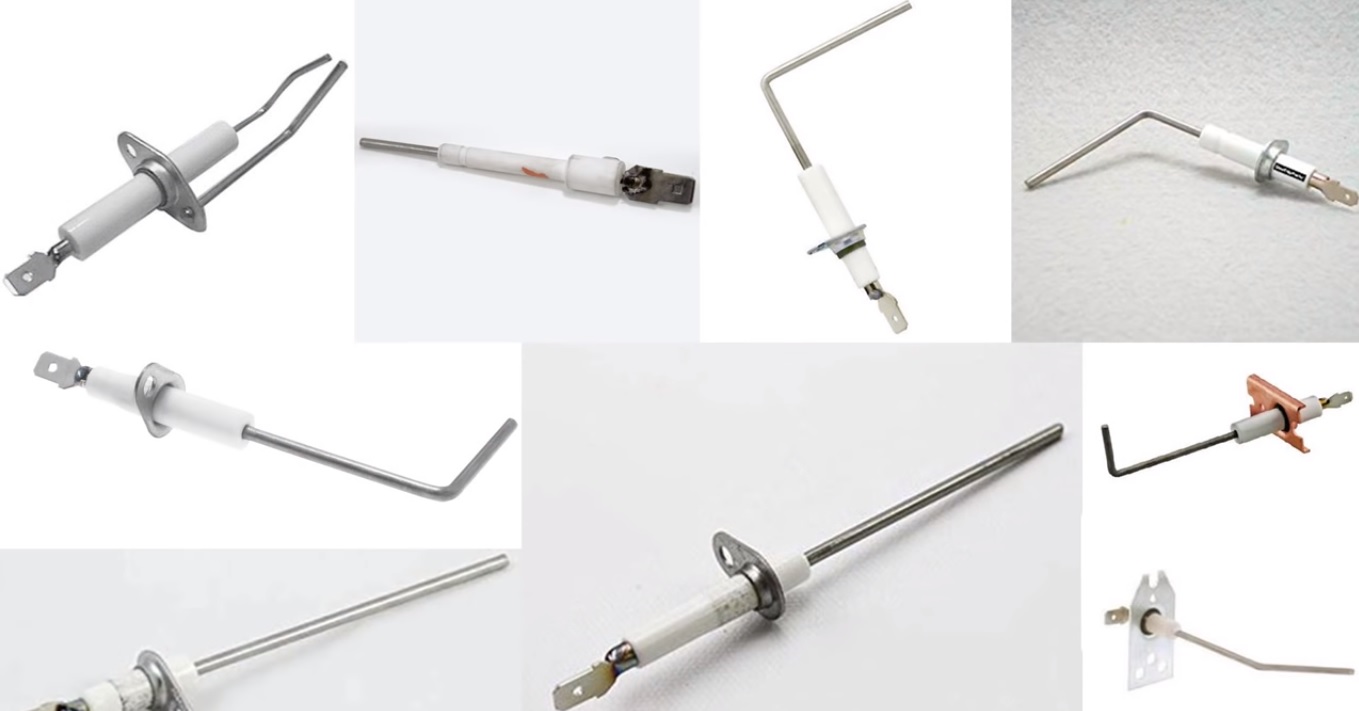
Take out the screw and wiggle the flame sensor out. It’s just a metal rod and it has different shapes. Most of the time, it’ll be L-shaped but there are many different styles of flame sensors.
If you see my flame sensor has some buildup on it, the buildup comes from the carbon inside of the flames.
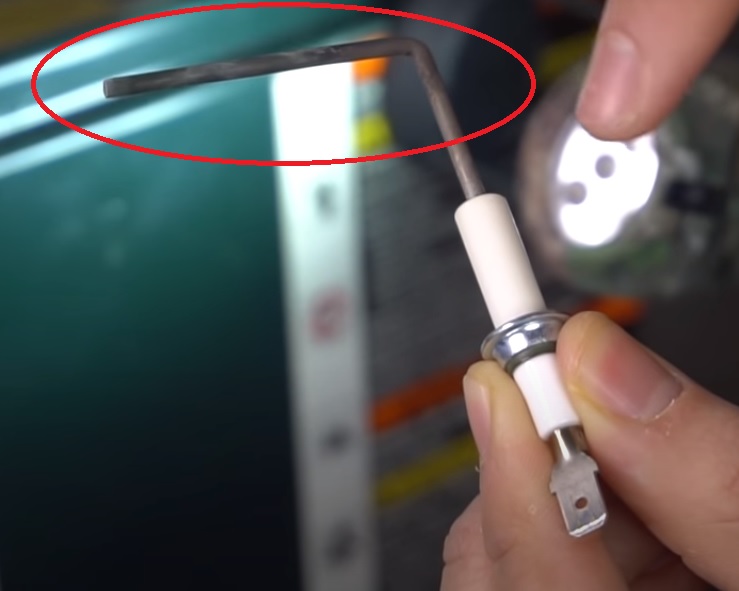
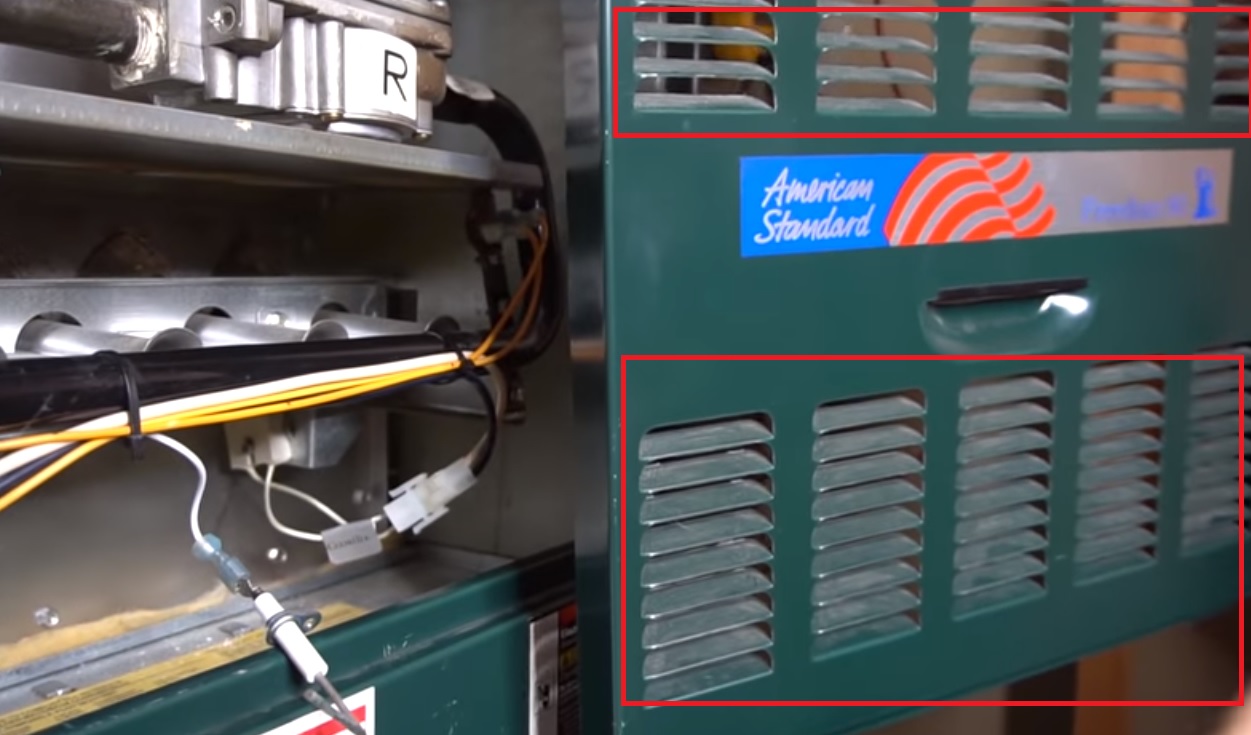
And also the front door’s grates, it’s sucking air in for combustion for the flames and whatever particles are in the air – dust and other debris also settles on this flame sensor.
And with time, when you have enough of a coating on the rod, it’ll prevent the flame sensor from sensing any flame.
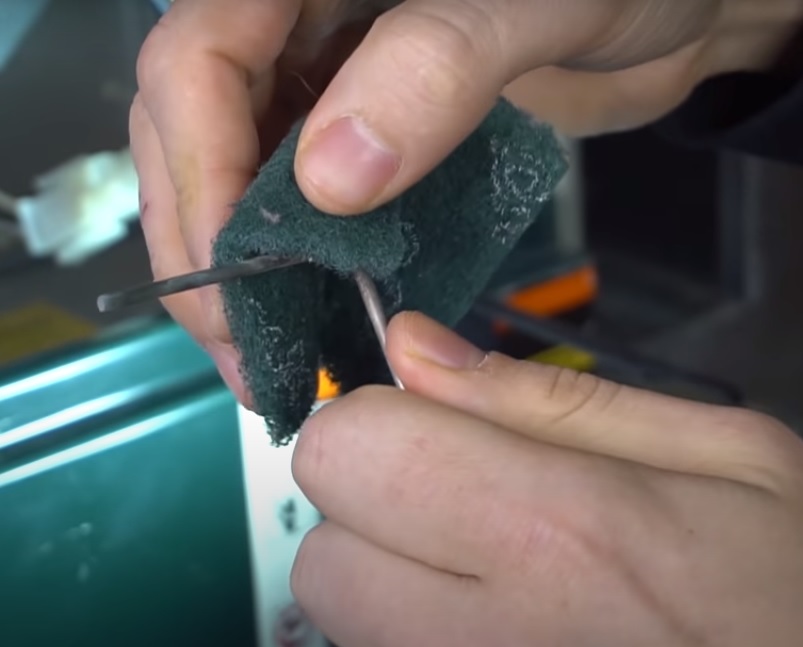
To clean the flame sensor, you can use some fine steel wool or a dishwashing scrubby. We recommend you use a Scotch Brite pad as this tends to work the best and last the longest. Sandpaper is not recommended because it tends to be too abrasive, if you scratch the rod then the stuff will stick to it even faster.
You have to firmly press it down hard and shine the rod up.
Once you clean that up you stick it back in and put the screw back in as well. There’s only one screw hole so you can’t put this thing back mistakenly.
Turn your power back on and see if that’ll make a difference.
And on a side note we work on many furnaces and some of them, the flame sensor is not easily accessible. Some carrier furnaces will have the flame sensor behind the burner box.
If that’s the case, it’s hard to get your flame sensor. Your options are to either try to take apart the piping or the venting or maybe even take out the inducer motor just to get to the flame sensor. Or use a flexible bit extension.
That way you can just put it on your drill and try to reach the back and get to it that way but even with a flexible bit extension, it’s still hard to get to it and you might need multiple extensions.
Some furnaces have the burners just about an inch of space between the burners and the floor of the cabinet. And it’s really hard to get in there with that small space.
One thing we would want to point out that will make a difference is about your venting. If you have a high-efficiency furnace, you’ll have plastic venting, the PVC pipes either white or black coming out of your furnace.

Or you’ll have steel venting going out to your chimney. The steel vented furnaces are 80 percent efficient and then the PVC vented ones are 90 percent efficient.
For the steel vented furnaces, the burner box is open and you can see everything whereas, on the high-efficiency furnaces, the burner chamber is usually sealed up so it’ll have a cover over it.
Generally, the cover is just held in by five or six screws and you can take all those screws out then you can pop that cover off.
If you can see your burners are staying on – the problem is fixed. There are more of the technical issues and other problems you might encounter while doing this and more tips and tricks – check out more from our other articles.
